The Austrian Dragoons
There are two figurines which do not square with my aesthetic criteria in the Essex Seven Years War Austrian Dragoons (SYA16) : The Officer and the Standard-bearer.
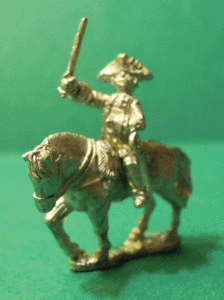
The Officer seems to salute as it was in the habit of doing in Germany between 1933 and 1945, which is not of the best visual effect [image 1]. For me, the Officer should lead his troops with drawn sword - as it is the case for the other Austrian Essex references - the Cuirassier and the Hussar. Hence the Dragoons Officer will be equiped with a sabre like his fellowmembers of the other categories.
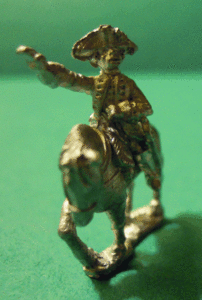
Image 1
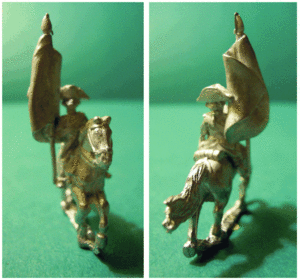
As regards the Standard-bearer, he shows the redhibitory defect of the majority of Essex Standard-bearers : The standard is molded in alloy and includes a part of the horseman's body [images 2 & 3]. Moreover, it is too big (about 180 cm x 120 cm to scale, the size of the real standard being 120 cm x 80 cm) and does not have the correct shape (it is rectangular while the Austrian Dragoons standard of the time is swallow-tailed). Therefore, some surgery will be required to separate the present standard from the rider's body, make a new arm to this latter, and supply him with a standard of correct dimensions and shape.
The Dragoons Officer :
Let us start with the Officer. In order to save time, I have chosen to take in the spares box an already (or almost) ready sabre. Fine, there is an Essex reference (SYA12) containing 8 Jägers Officers with the sabre drawn - we can sacrify one without too many regrets.
The matter is, in a first step, to cut the legs of the figurine from each side of the weapon, to isolate it, then to cut the arm at the level of the wrist to keep the hand with the sabre [image 4]. Thereafter, a hole is drilled in the wrist (d = 0.5 mm) in order to insert a stud which will afterwards guarantee a strong fixing. Of course, the figurine is wasted, but this is for the greater good. And I keep the tricorn for another use.
Image 4
Secondly, the Officer's right arm is submitted to a 90° rotation in order to bring back the forearm and the hand in the vertical axis. This will give the correct orientation to the sleeve and glove cuffs. The alloy is malleable enough to accept this kind of acrobatics but it is necessary to work slowly, not to create distortions (try not to make a Reed Richards arm) and not to mark the material (to do this, I use needle-nose pliers on which I cemented styrene pads - so there is enough grasp but it does not leave marks). Once the hand and cuffs are vertical, the wrist is cut close to the cuff, a hole is drilled (d = 0.5 mm) to receive the stud which has been previously fixed to the hand holding the sabre [image 5].
In passing, I have straightened and flatened the sabre. Too often, blades in 15 mm look like sticks. And sticks, they bruise, they do not cut.
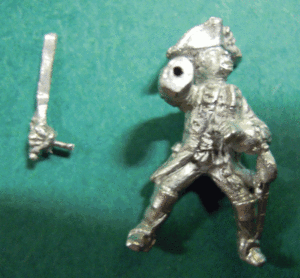
Image 5
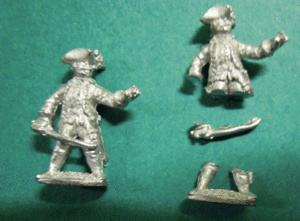
After the ajustements as usual, the hand and sabre are cemented to the arm - and here is an Officer of Dragoons leading is troops to battle [image 6], not a fellow looking at the sky while feeling with his hand if raindrops are falling !
Image 6
Note : Those with a sharp sense of observation will have noticed that the background's shade is not the same in images 4 and 5 as in the others : This is because they have been taken with a different source of lighting ! (cool light instead of warm light). Henceforth, I will use the same light for the photographies ...
There are just a few details left : Cutting the hilt of the sabre in the sheath at the left side of the figurine (it is samurais who have two sabres ...) and adding an aiguillette in very thin brass wire (Austrian Dragoons were wearing an aiguillette on the right shoulder, Officers included).
I've left my comment in the wrong place. I just thought your article on conversion was very well done. I liked the hint on using styrene pads on the pliers. Your officer looks like he means business now.
ReplyDeleteBon Chance!
Don